OpenModelica and Python via CORBA (Part 1: getting started)
Part 1 (getting started) | Part 2 (IDL compilation) | Part 3 (Python wrapper)
In this post I’m going to be walking through the process of setting up omniORB with Python for the purpose of interacting with the CORBA interface provided by the OpenModelica compiler (OMC). This allows OMC to be controlled from a Python script (loading simulations, changing parameters, etc). While the intention of this post is specifically that of interacting with OMC, the installation of omniORB will be the same in other situations. Note though that you may require additional setup in these other situations, for omniNames for example. I will be showing the setup process for Linux (and specifically, Mint/Ubuntu). I will assume that OpenModelica is already installed.
Note: It is very likely that the process described in this series of posts has already been performed by someone else. For example, a Python wrapper for OMC’s CORBA interface has been implemented by a team in Sweden whose code is already included with OpenModelica. However, this series should hopefully provide sufficient information to allow you to implement such a wrapper in a different language that doesn’t already have one. From a brief search, C++ seems to be one such that also happens to be supported by OmniORB. Java provides its own CORBA libraries but does not appear to have a convenient OMC CORBA wrapper yet.
The first step is to download the latest omniORB and omniORBpy releases from http://sourceforge.net/projects/omniorb/files/. At the time of writing these were omniORB 4.1.7 and omniORBpy 3.7. I’m going to assume you want to install to your home directory rather than to a system-wide location.
Open up a terminal and setup the root directory omniORB (replace user with your own username).
mkdir -p omniORB/src
cd omniORB/src
export PREFIX=/home/user/omniORB
Extract the previously downloaded files to the src directory, making sure to preserve directory structure. After that, build omniORB and omniORBpy.
cd omniORB-4.1.7
mkdir build
cd build
../configure --prefix=$PREFIX
make
make install

cd ../../omniORBpy-3.7
mkdir build
cd build
../configure --prefix=$PREFIX
make
make install
Your $PYTHONPATH environment variable needs to be extended to include the Python module install location and your $PATH variable needs to include the omniORB bin directory. I haven’t made these edits permanent, so they must be done each time the Python modules or the utilities are required in a new shell.
export PYTHONPATH=$PYTHONPATH:$PREFIX/lib/python2.7/site-packages
export PATH=$PATH:$PREFIX/bin
At this point, you have a functional install that will allow you to interface to the OpenModelica compiler from a Python script. The remainder of this post uses some existing example code to test that everything is working correctly.
First, download the code from http://www.ida.liu.se/~adrpo/omc/corba/_windows/python_2.5-omniORBPy_3.3-win32.zip. This was written for Windows, so there are a few changes to make to omc_communication.py:
- Add to the list of imports:
import getpass - Edit line 15:
omc_objid_file = tempdir + “/” + “openmodelica.%s.objid” % getpass.getuser() - Edit line 44:
“loadFileInteractive("/usr/share/doc/omc/testmodels/BouncingBall.mo")”,
In a different terminal run omc with the CORBA interface active. You could run this in the background in the current terminal, but I prefer to be able to distinguish between output from different programs.
omc +d=interactiveCorba
Back in the original terminal:
export TEMP=$PREFIX/tmp
python omc_communication.py
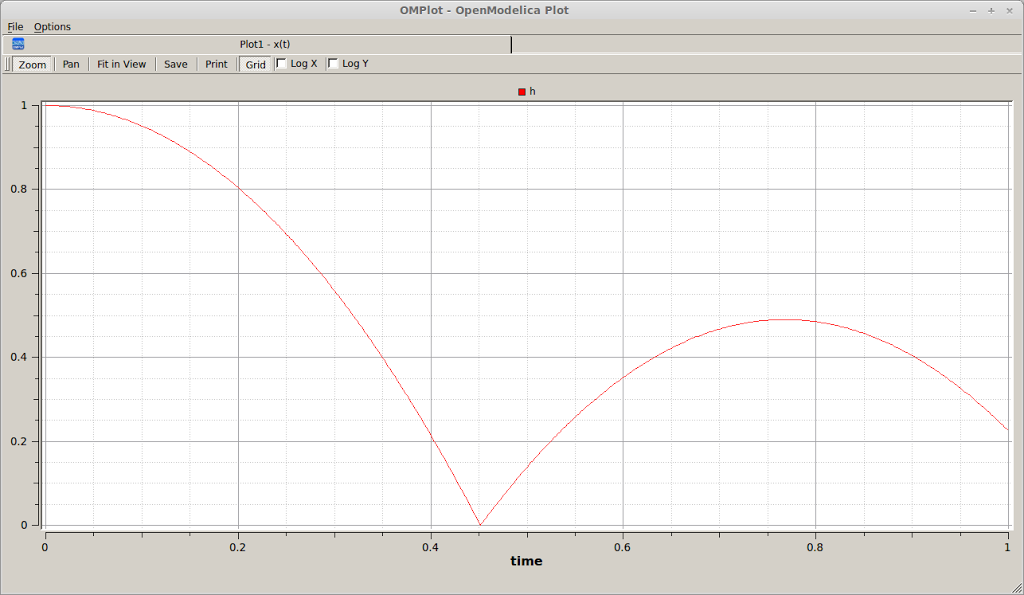
If the test is successful you should see a graph as below.